Managing your DataMart Metadata
This documentation references PopMedNet 2021.1 +
PopMedNet User's Guide
Based on version 2021.1 +
Managing your DataMart Metadata
Each DataMart has its own profile page on the Portal. These pages provide information about the specific data sources that organizations are using in the network. Any user in the network may view this information.
Editing your DataMart Metadata
- Navigate to the DataMart list page (Network > DataMart)
- Click on your DataMart entry in the list to display the DataMart profile
- Complete the following fields:
- Contact Information: enter the first name, last name, phone, and email address of the contact for this DataMart.
- Health Plan Description: enter a description of your organization
- Collaboration Requirements and Additional Information: describe your collaboration requirements for this DataMart and any additional information that you would like to make available to the network.
- Type of Data Available: select the type of data that is available in this DataMart. Enter additional data types in the "Other" field.
- Data Period Range: specify the time period that your data covers and the frequency with which your data source is updated.
- Data Model: select your data model from the dropdown list. If your data model is not listed, select "Other" and enter the name of the data model in the box provided.

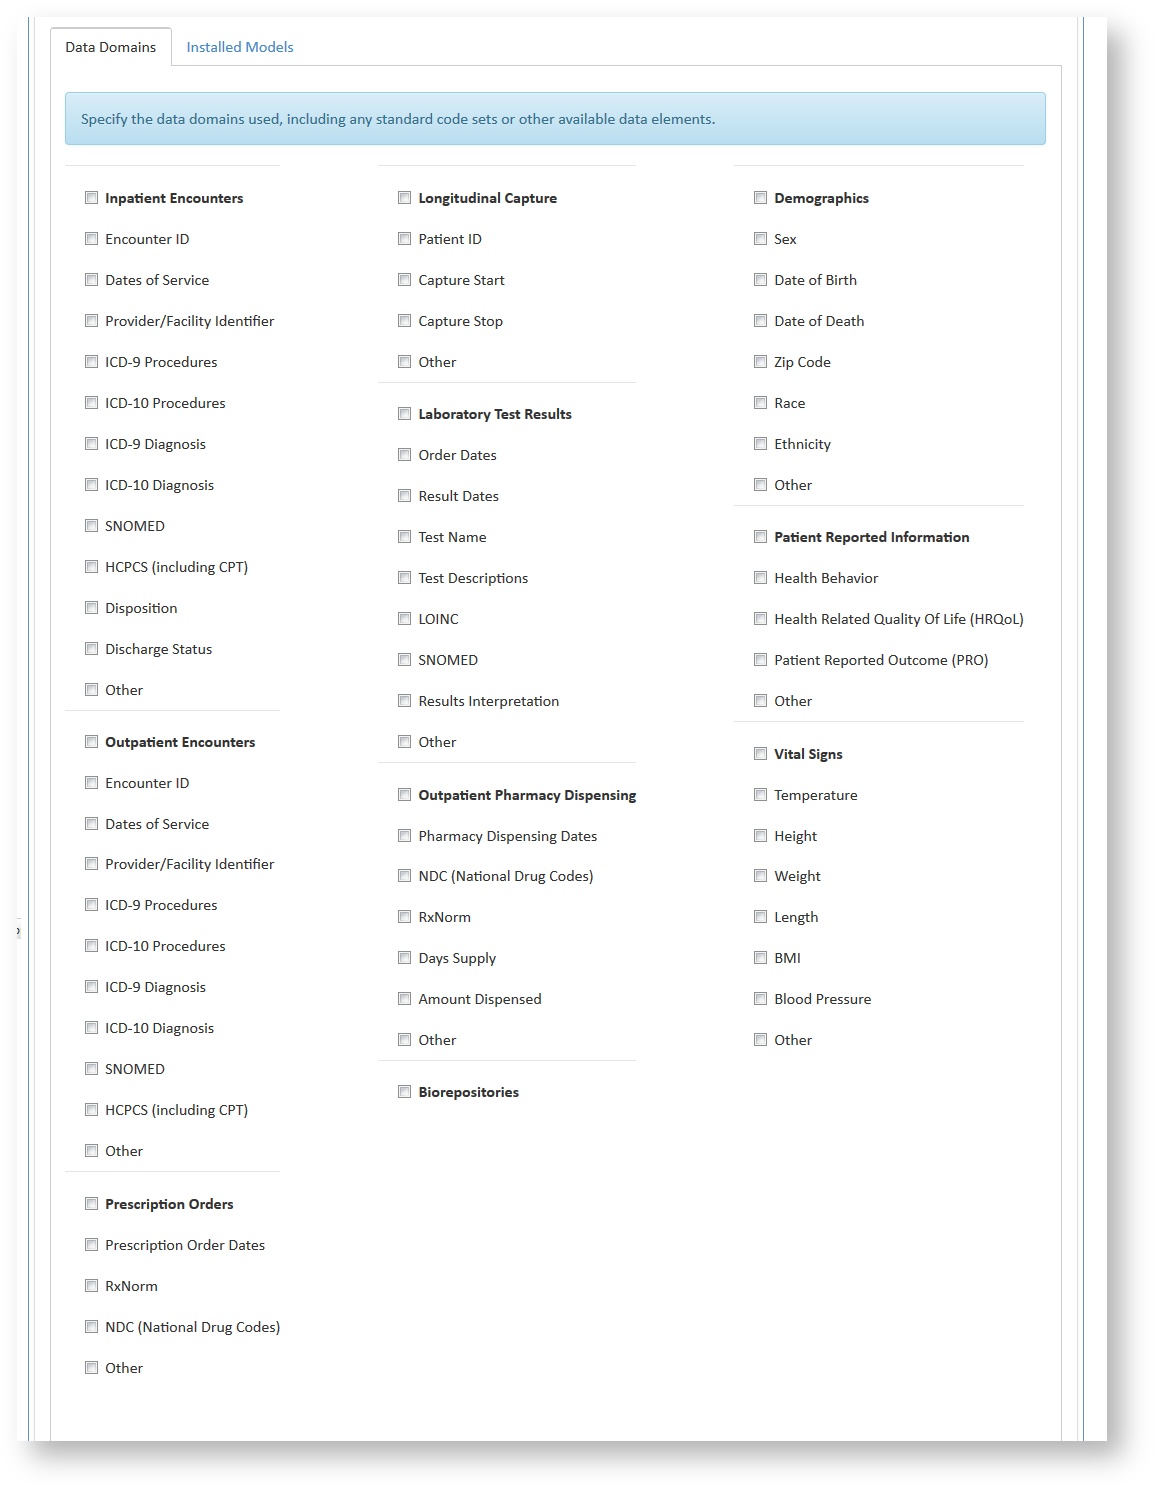
Every DataMart profile page has a Data Domains section where you can provide information on what kinds of data are contained within your DataMart.
Editing your Data Domains
- Navigate to the DataMart list page (Network > DataMart)
- Click on your DataMart entry in the list to display the DataMart profile and scroll down to the Data Domains section
- Types of data can be checked off to indicate their presence within your DataMart. You can check off overarching domains that are bolded, and you can check off more specific categories within those domains.
- If you have a type of data that is not listed, check off 'Other' in the most appropriate domain category and enter it in the new field.
- Once your entered information is up to date, scroll to the bottom of the page and click 'Save'.