Using Shared Folders v4.0.3
This documentation references PopMedNet 4.0.3
For version 5.0 documentation, please see PopMedNet User's Guide
Distributed Query Tool - User's Guide
Based on version 4.0.3
Using Shared Folders
Investigators may make use of shared folders to store and share requests with other network users. When a request is shared, only the request metadata and request specific criteria are available to the users with permission to access the shared folder. Any DataMart Routing information or results are not accessible via shared folders.
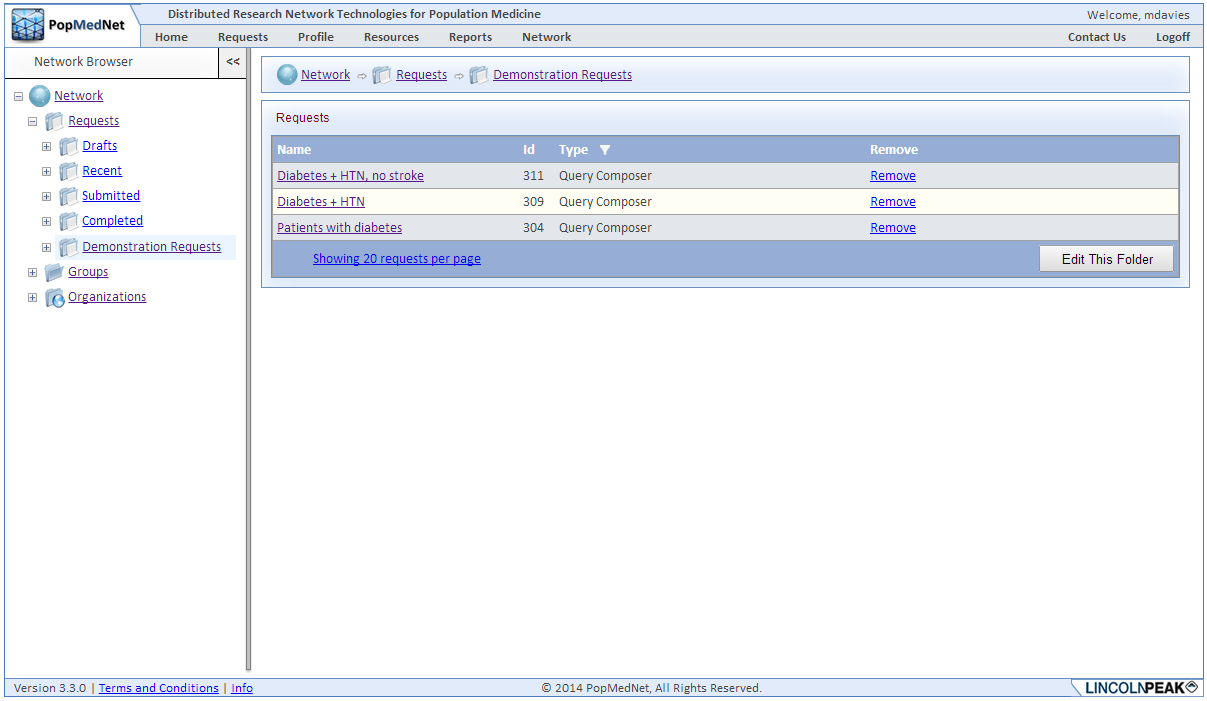
Shared folders are accessible via the Network Browser. Any request may be added to a shared folder and users with access to the folder may copy the request to create a new draft that they may edit and submit.
Creating a Shared Folder
The ability to create shared folders is controlled by access rights. Contact your Network Administrator for assistance if you do not have the appropriate rights.
- From any page on the network, open the Network Browser by clicking the grey box at the top left of the screen and expand the tree control to reach the "Requests" level.
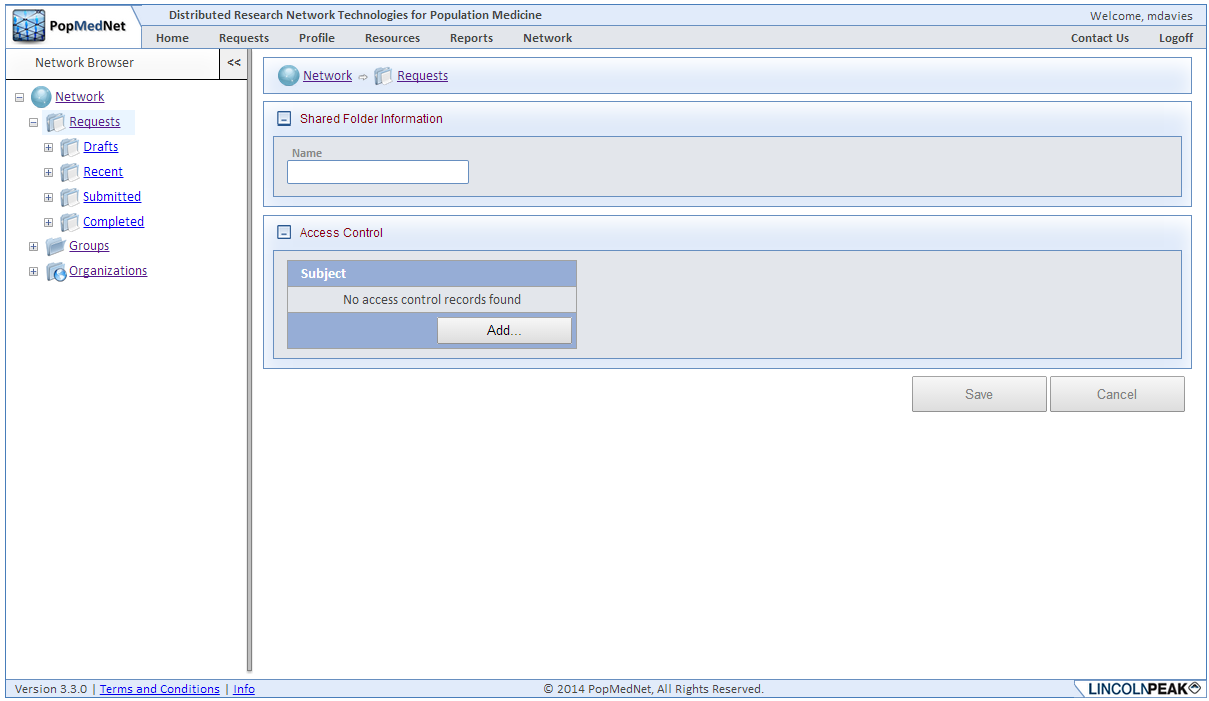
- Right click on the "Requests" folder and click "New Shared Folder."
- Enter a name for the folder.
- Assign access rights to the folder from the Access Control panel. If access rights are not assigned then only you and users with default access to all shared folders (for example, Network Administrators), will have access to the folder.
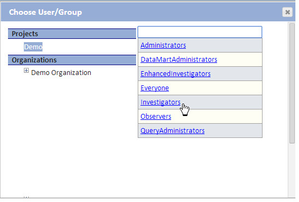
- Click "Add..." in the Access Control panel to bring up the Choose User/Group dialog. This allows you to select the Security Groups that may be granted rights to your folder. The left side of the dialog lists the projects and organizations in your network. To navigate to sub-organizations, click the + icon next to the name of the parent organization. The right side of the dialog lists the roles and users for the project or organization currently selected. Choose a Security Group by first selecting the organization or project on the left and then the role on the right. In the image to the right, the Demo/Investigators security group is selected. Individual users may also be selected by selecting their organization on the left and their username on the right.
- After selecting a security group, the Choose User/Group dialog will close and the security group will be added to the Access Control panel. Each right in the panel may be allowed, denied, or left unchecked. Checking the "Allow" checkbox grants the security group the right. Checking the "Deny" checkbox explicitly denies the user the right, even if they have been granted the right elsewhere.
In the image to the right, the Demo/Investigators security group has been granted the rights to view the folder ("Read") and to add and delete requests from the folder. Unless the Demo/Investigators security group has been granted rights to manage access, edit, or delete any shared folder from other access controls in the network, they will not be able to perform those actions. - Repeat steps A and B for each security group for whom you want to permit or deny access to this folder.
Click "Save" to finish creating the folder.
After creating the folder, click "Edit this Folder" to return to the previous screen where you may change the name or reassign access controls.
Note that in the Access Control panel, you may see security groups that you did not add. These security groups have inherited access rights that have been enabled elsewhere in the network. You may override these rights by clicking the "[inherited]" link and clicking "[override]" in the pop-up box. This will reactivate the "Allow" and "Deny" checkboxes and allow you to explicitly deny the security group that right.

Adding Requests to a Shared Folder
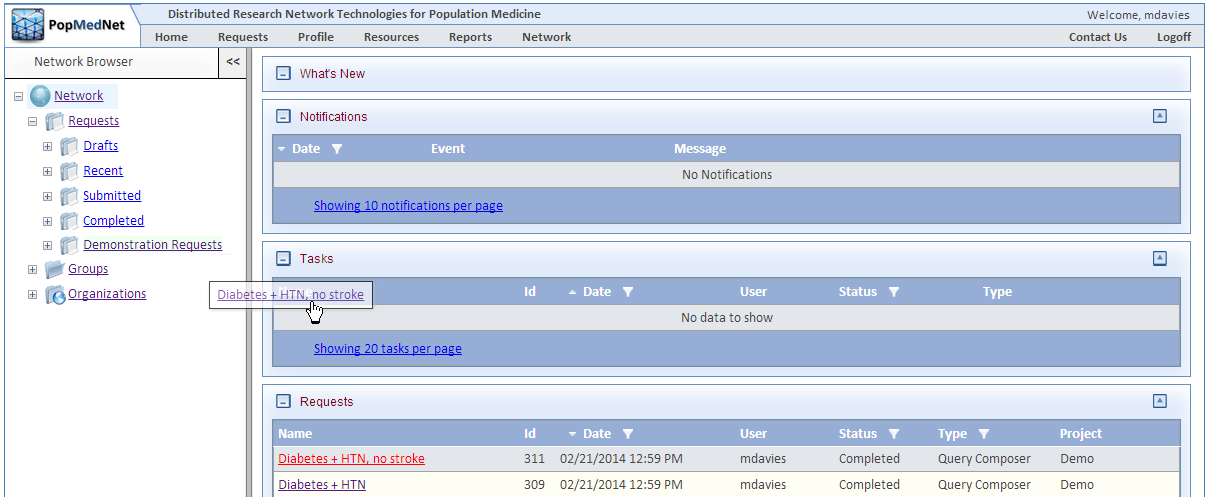
- Navigate to the home page or the Requests list and locate the request that you want to add to the folder.
- Expand the Network Browser and locate the folder that you want to add the request to.
- Click and hold the name of the request, then drag it into the folder.
Viewing Requests in a Shared Folder
- Navigate to the shared folder via the Network Browser.
- Requests in the folder are listed by name, the request ID of the original request, and the request type. Click on the name of the request to view it.
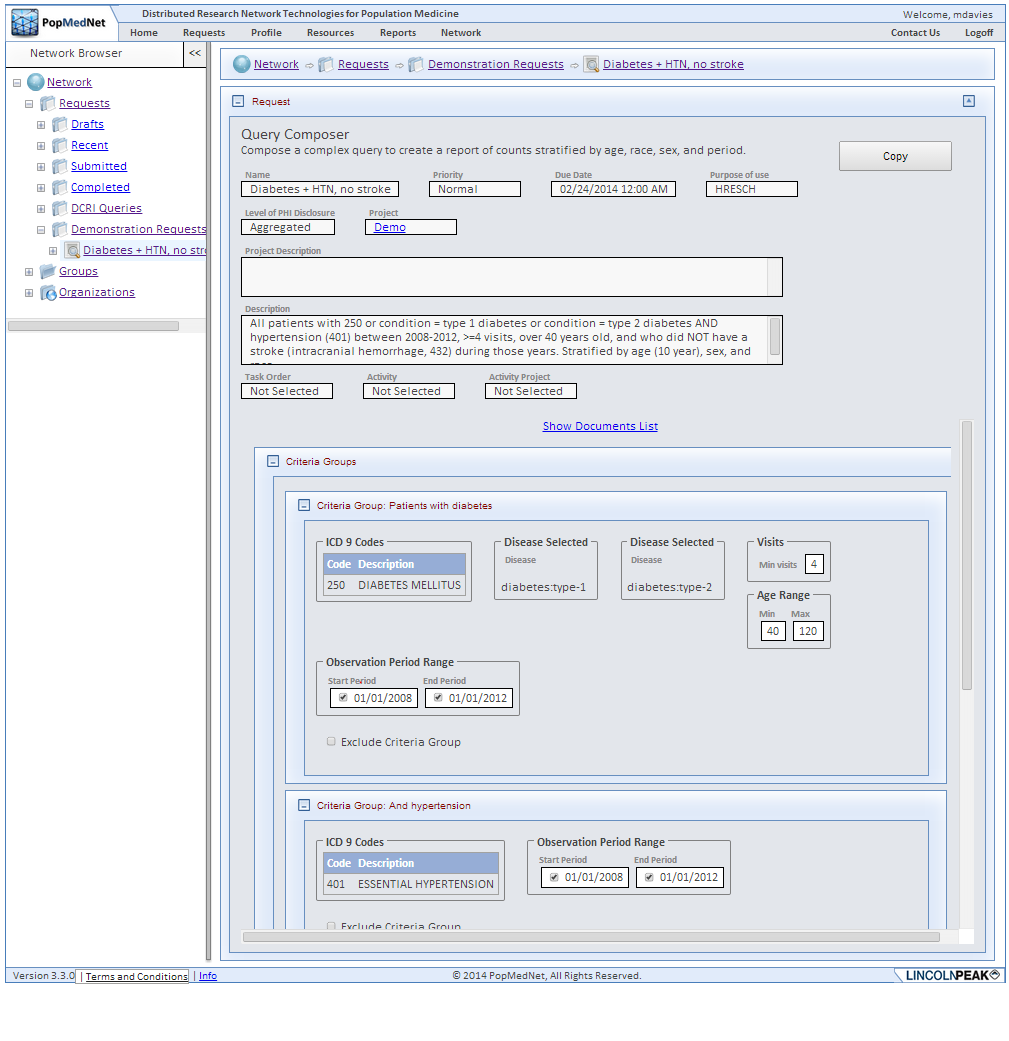
- Only the request metadata and parameters may be viewed. No DataMart Routing information or results are available. To make use of the request, click "Copy." This will create a new copy of the request and open the Request Composer page where you may make edits and submit the request.
Removing Requests from a Shared Folder
- Navigate to the shared folder via the Network Browser.
- Requests in the folder are listed by name, the request ID of the original request, and the request type. Click "Remove" to remove the request from the folder. Note that this action only removes the request from the shared folder, it does not remove the original request from the system.
