Executing and Responding to Requests
This documentation references PopMedNet 2021.1 +
PopMedNet User's Guide
Based on version 2021.1 +
Responding to Requests
After reviewing the request details, the request may be responded to in one of the following ways:
- Menu-driven requests may be executed and the results uploaded
- File Distribution and Modular Program Distribution requests may be responded to by uploading files
- The request may be held
- The request may be rejected
Executing and Uploading Menu-Driven Requests
The process for executing and uploading menu driven requests is the same for Sentinel Summary Table queries, MDPHnet ESP Queries, and PCORnet CDM Menu-driven Queries
Locate the request in your DataMart client; double click on the request to open it.
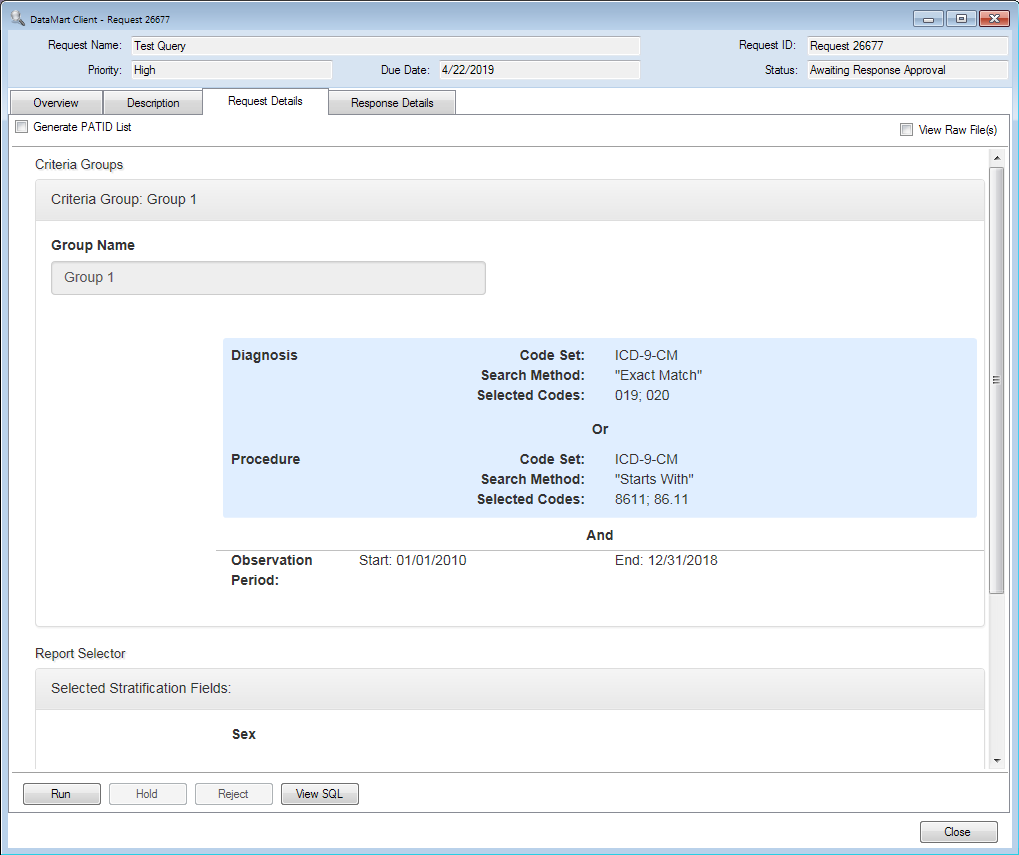
After reviewing the request parameters in the "Request Details" tab, execute the request by clicking Run.
This action will convert the request parameters of the request into SQL for execution against your selected data source.
Results will be displayed in the "Response Details" tab.
You may also export the results into an Excel or CSV file by clicking Export Results.
12/13/17: For Sentinel Summary Tables, do not click view SQL after running the request in the DataMart Client. This will cause the SQL to be uploaded as the response, rather than the query results. A fix for this bug will be released soon.
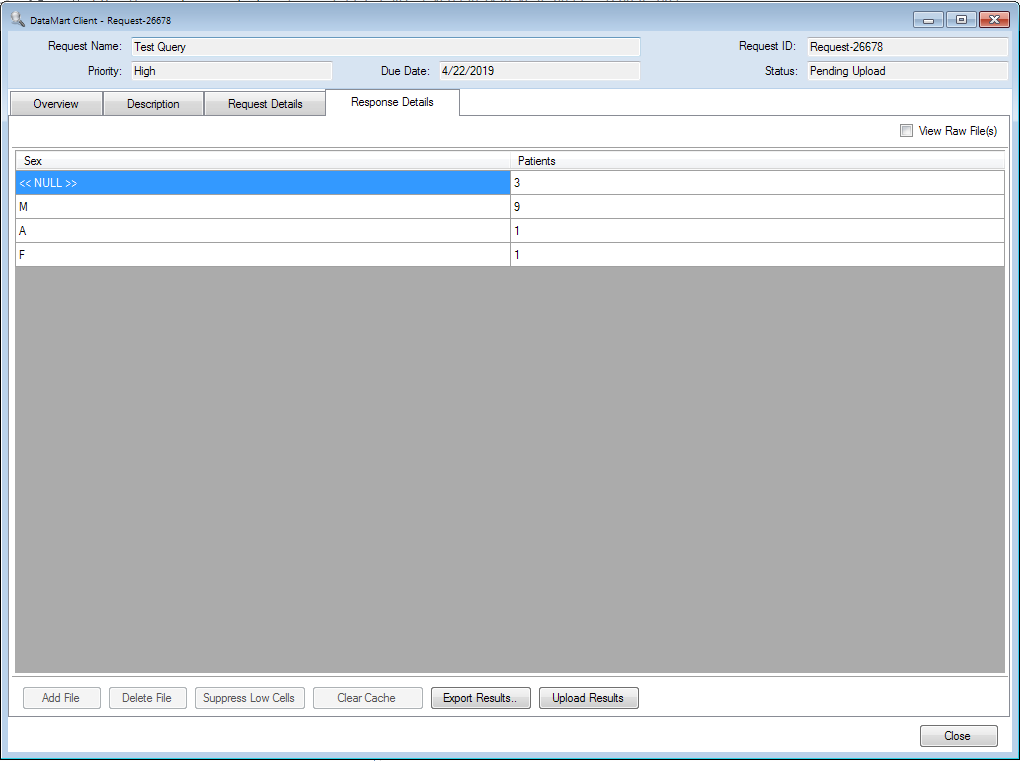
If you have set a low cell count setting, low cells will be highlighted in yellow and a message will appear to notify you that low cells were detected. Click Post Process to set the low cells to zero.
Suppressing low cells is only relevant for Summary Table Queries. Note that the governance for your project or network may or may not permit suppressing low cells. Contact your PopMedNet Network Administrator for more details.

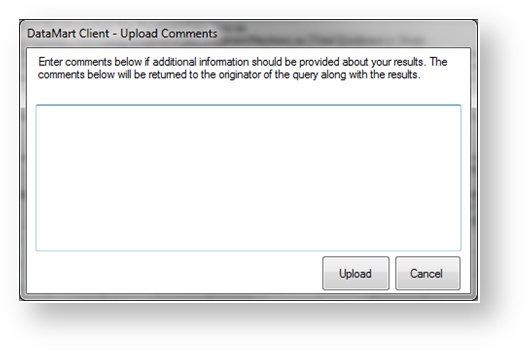
Click Upload Results to upload the results of the request to the Portal. You may leave a comment if you would like to provide additional information. The requester will see these comments along with the results on the Portal.
If there are multiple DataMart Administrators administering your DataMart, the Upload Results button will grey out once one user has uploaded results. Once results are uploaded, the request is complete/ However, you may still review the results by clicking Run.

Responding to File Distribution and Modular Program Distribution Requests
File Distribution requests allow requesters to send files to and/or request files from network DataMarts and for DataMart Administrators to upload files as a response. Modular Program Distribution requests allow requesters to send modular program packages to network DataMarts and for DataMart Administrators to upload response files.
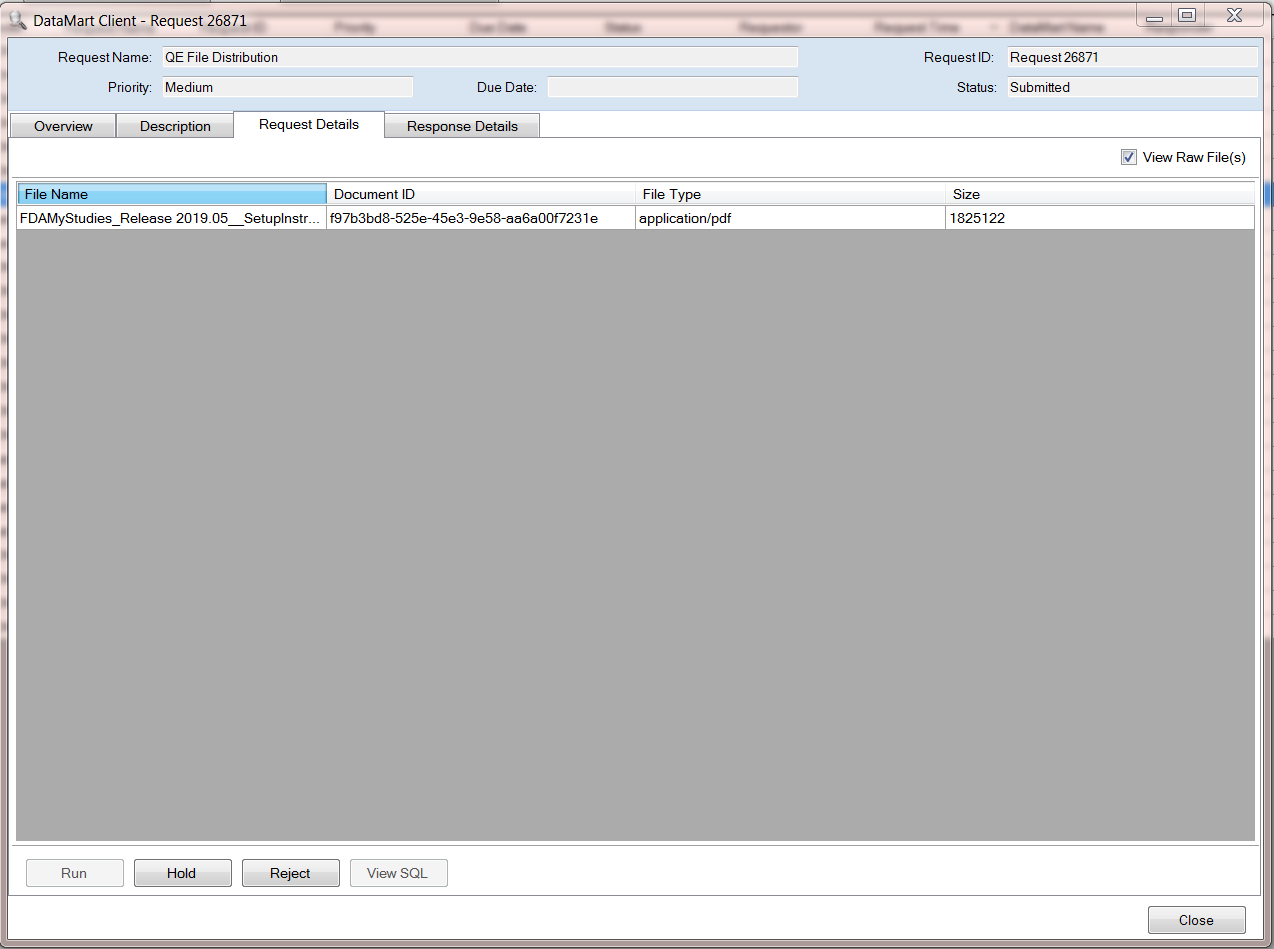
Viewing Request Details
Check the "View Raw File(s)" checkbox to view any files associated with the request. Note that the files listed are stored on the Portal, not in your DataMart Client. You must save the file locally to transfer it from the Portal for viewing. Click the file name to download the file to your computer and select a location to save the file.
- File Distribution Requests: file view is enabled by default.
- Modular Program Distribution Requests: the default view displays the package manifest of the request, including the names of any files distributed with the request. The files may only be downloaded from the File View. In addition to the files distribution by the Investigator, File View also displays two files that contain the request metadata and parameters: ModularProgramRequest.xml and ModularProgramRequest.html. These files do not need to be downloaded.
Responding to the Request
Multiple files of any type may be uploaded in response to a Modular Program Distribution request.
To add a file as a response, click the Add File button at the bottom of the "Response Details" tab and use the file browser to select the file. Files that have been added to the request response will be listed in the Response panel.
To delete a file before upload, select the checkbox for that file and click Delete File.
Once you have attached all your files to the request, click Upload Results to upload the files to the Portal. You may leave a comment if you would like to provide additional information to the requester. The requester will see these comments along with the files on the Portal. Once a response has been uploaded, no more files may be added.
The DataMart Client does not store any files that you uploaded in response to a request. You may view the files that you uploaded by viewing the request on the Portal.
Holding Requests
You may place a request on hold to notify the requester that you have received or executed the request, but have not yet uploaded results for it.
Place a request on hold by clicking Hold in the "Request Details" tab and include comments if necessary. The request status in your DataMart Client and for the requester on the Portal will change to "Hold." The requester will also be able to view any comments that you uploaded.
Rejecting Requests
You may reject a request before or after execution.
Rejecting a request irrevocably ends the request at your DataMart. A rejected request may not be resubmitted to your DataMart.
To reject a request, click Reject in the request detail view and provide comments for the requester. The request status in your DataMart Client and for the requester on the Portal will change to "Rejected" and the requester will be able to view any comments that you uploaded.
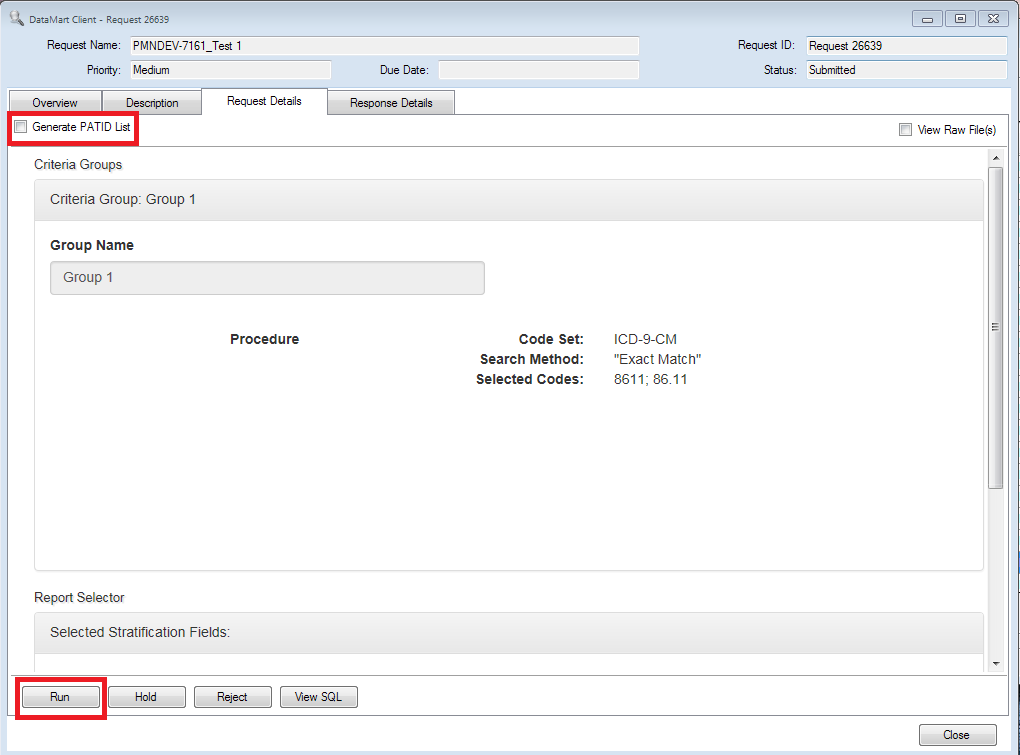
Generating a PATID List
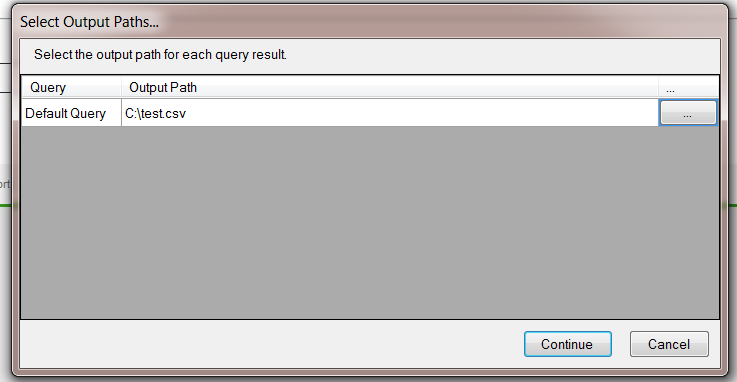
For PCORnet CDM Menu-driven Queries, a user may generate a list of all PATIDs (in .csv format) corresponding with the results of the query. To do so, check off the "Generate PATID List" box in the "Request Details" tab prior to running the request, then click "Run" in the bottom left corner. A window will then appear for you to specify the file path for the results to save to. Once you have specified a file path, click "Continue" and the PATID list will save to the location specified.
NOTE: Running an MDQ to generate a PATID list does NOT allow you to upload results, to upload results you must run the request with the "Generate PATID List" box unchecked.